DIY - Wetsanding plastic headlights
#1
DIY - Wetsanding plastic headlights
Originally posted by *alwaysoverkill*
for this i went with the following grits of automotive sandpaper and wetsand using water with soap in it to lubricate:
HERES WHAT YOU NEED:
all this sandpaper is $2.79ea at CDN tire.
180 (only if really, really, REALLY bad)
400
800
1000
1500
2000
Meguairs Plastx
Sanding block
bucket of water with soap in it
cloth x 3 (1 to keep area wet, 1 to dry area to see your progress, 1 for plastx)
buffer (orbital or highspeed if you have it, if not use cloth)
SANDING (gets as smooth as a baby's butt)
sand for about 5 minutes per grit in a smooth steady motion, each grit will erase all lines from the previous, so when i got to 1500 and 2000, i used those just a tad longer.
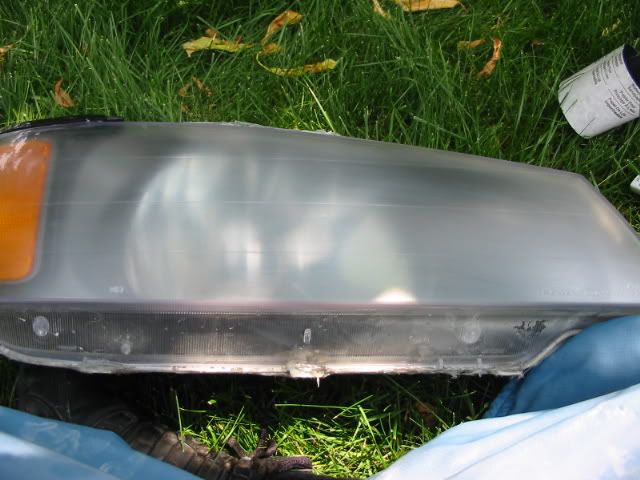
START (look at that pitting and hazyness)

180/400

800
[img]
http://img.photobucket.com/albums/v226/alwaysoverkill/IMG_2456.jpg[/img]
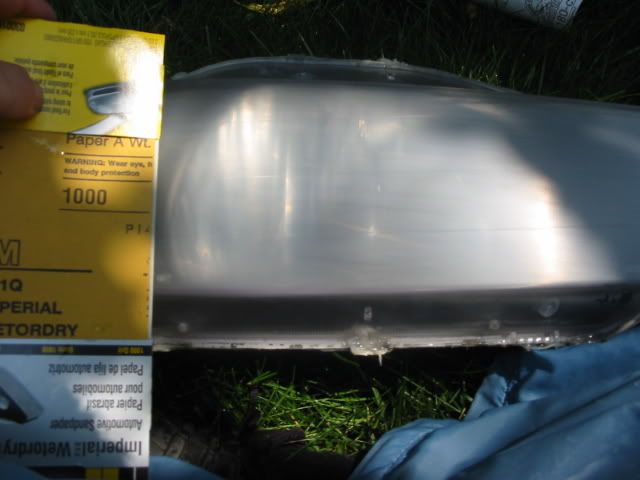
1000

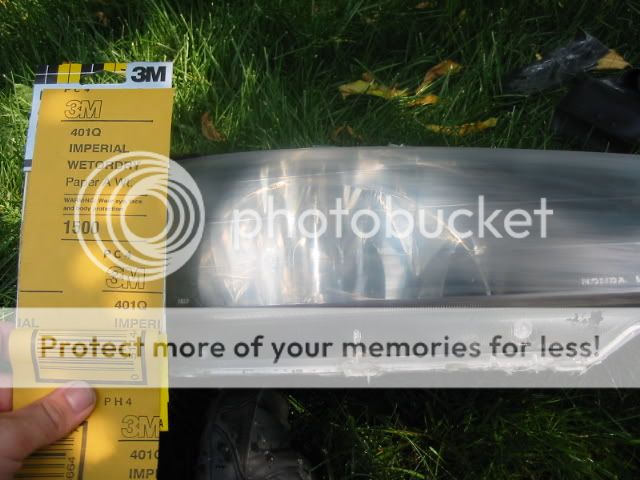
1500

2000

then orbital buffer and meguairs plastx (or other buffing/polishing compound) which removes the cloudy part from all the sanding and leaves it crystal clear. did this for about 15 minutes and really worked it in the best i could applying about 3 coats of plastx.

NOTE: a highspeed buffer would have removed all lines and make it shiny as hell, but i don't have access to a highspeed buffer. i'd probably go 1800-2500rpm since its plastic and if it heats up it won't be pretty. move it around alot and stop to feel how hot its getting, highspeed buffing makes alot of heat and if you melt a part of the lens, your ****ed. another trick to this is to use spray water to cool it down, i wouldn't recommend this way unless you know what your doing and have done it before.
Why 180 grit, thats pretty heavy isn't it?
yes, one of my headlights was so bad, it looks like it was from a 1990 civic that has never been washed. after this its crystal clear and you cannot see any scratches unless your like 1ft away, then you can see some small lines from wetsanding, this is because i had to go down to 180 grit to get all the pitting out. the drivers headlight was started at 400 and there are virtually no lines at all, but it was replaced at somepoint before, so it was much newer.
for this i went with the following grits of automotive sandpaper and wetsand using water with soap in it to lubricate:
HERES WHAT YOU NEED:
all this sandpaper is $2.79ea at CDN tire.
180 (only if really, really, REALLY bad)
400
800
1000
1500
2000
Meguairs Plastx
Sanding block
bucket of water with soap in it
cloth x 3 (1 to keep area wet, 1 to dry area to see your progress, 1 for plastx)
buffer (orbital or highspeed if you have it, if not use cloth)
SANDING (gets as smooth as a baby's butt)
sand for about 5 minutes per grit in a smooth steady motion, each grit will erase all lines from the previous, so when i got to 1500 and 2000, i used those just a tad longer.
START (look at that pitting and hazyness)

180/400

800
[img]
http://img.photobucket.com/albums/v226/alwaysoverkill/IMG_2456.jpg[/img]
1000

1500

2000

then orbital buffer and meguairs plastx (or other buffing/polishing compound) which removes the cloudy part from all the sanding and leaves it crystal clear. did this for about 15 minutes and really worked it in the best i could applying about 3 coats of plastx.

NOTE: a highspeed buffer would have removed all lines and make it shiny as hell, but i don't have access to a highspeed buffer. i'd probably go 1800-2500rpm since its plastic and if it heats up it won't be pretty. move it around alot and stop to feel how hot its getting, highspeed buffing makes alot of heat and if you melt a part of the lens, your ****ed. another trick to this is to use spray water to cool it down, i wouldn't recommend this way unless you know what your doing and have done it before.
Why 180 grit, thats pretty heavy isn't it?
yes, one of my headlights was so bad, it looks like it was from a 1990 civic that has never been washed. after this its crystal clear and you cannot see any scratches unless your like 1ft away, then you can see some small lines from wetsanding, this is because i had to go down to 180 grit to get all the pitting out. the drivers headlight was started at 400 and there are virtually no lines at all, but it was replaced at somepoint before, so it was much newer.
#5
the polishing compound isent a layer of somethin its like the finest sandpaper around what it does is remove all the little tiny scratches that the sand on the papar cant get rid of
the only way they get worse is if the sun wil **** the surface again
i used the rubbing compound and a hard sponge sanding disk with no pad on the bottom i think they are used 4 waxing cars i just aplyed the compound 2 that and threw it on my drill and away u go
but dont hold it in 1 spot 4 2 long and keep wetting the surface or it gets hot and burns bubbles into the surface i have done that with 2 escort wagins and a tempo and they all turned out good
the only way they get worse is if the sun wil **** the surface again
i used the rubbing compound and a hard sponge sanding disk with no pad on the bottom i think they are used 4 waxing cars i just aplyed the compound 2 that and threw it on my drill and away u go
but dont hold it in 1 spot 4 2 long and keep wetting the surface or it gets hot and burns bubbles into the surface
 i have done that with 2 escort wagins and a tempo and they all turned out good
#8
just don't buy the plastic restoration lens kit at canadian tire...its garbage!! I tried it and its supposed to come with 1000, 1500, 2000, and 2500 grit paper, but it only came with 1000, and 1500, so i returned it 3 times and all of them had the 2. Then i tired a different one and same thing, so i tired to buy the 2000 and 2500 seperatly and neither store had stock so i just went ahead and did it and it dosent look any better. Im gonna try the meguires stuff next and try to find a place where they have a good selection of automotive sandpaper.
#9
Awesome DIY, I did mine not too long ago and it came out alright, I didnt go as low as 180 grit, but I'll try and see if it's any better, cause they were seriously bad. I opened my headlights up when i was painting the inside to make it look darker, so there could be some haziness inside as well. Eh well, they still look awesome. 

#12
just curious...why did they put plastic for headlights anyways? shouldn't it be glass in the first place? Back in my country honda cars have glass headlights and we never had this problem.
great DIY, excellent timing as well... my headlights needs sanding!
great DIY, excellent timing as well... my headlights needs sanding!
#13
i could see the WD40 doing some damage cuz it eats plastic, i guess it depends how much and how long you put it on for
#14
Googled PlastX Clear Plastic Cleaner & Polish and found this video... enjoy.
meguiars.com: Car Care Video Guide
meguiars.com: Car Care Video Guide
#15
Googled PlastX Clear Plastic Cleaner & Polish and found this video... enjoy.
meguiars.com: Car Care Video Guide
meguiars.com: Car Care Video Guide
Im gonna check it out and if its worth it ill post before and after pics.
#17
^There isn't a cover, per say, that you remove. You must remove the whole head-lamp assembly. It's really not that hard. You just need some simple hand tools and a little patience...lol.
Do a search here on tcc or google for removing head lamp for 96-00 civic and you'll find step by step instructions.
Good luck.
P.S. I do this procedure once a year and apply plast-X at least once a month. It works well and keps your lights looking/performing like new.
Do a search here on tcc or google for removing head lamp for 96-00 civic and you'll find step by step instructions.
Good luck.

P.S. I do this procedure once a year and apply plast-X at least once a month. It works well and keps your lights looking/performing like new.
#18
I got one quick question, after restoration, can anybody recommend putting on those clear film on the front of the lens to add extra protection? I don't want to do this every year, but doing it once ever 3 years is something I can accept.
Thanks in advanced.
Thanks in advanced.


