
Carbon Fiber Hood - Refinishing/Re-clear coating???
 08-Apr-2008, 05:41 PM
#1
Junior Member
Thread Starter

Join Date: Apr 2008
Posts: 2
Carbon Fiber Hood - Refinishing/Re-clear coating???
Hey...
sup alll....
I have a CF Hood that is really dull looking, i think my hood need refinishing/re-clear coating badly...
can some one recommend a reasonable body shop that does good work???or if there are any *members* on here that can do this kinda of work, let me know...
Thanks
sup alll....
I have a CF Hood that is really dull looking, i think my hood need refinishing/re-clear coating badly...
can some one recommend a reasonable body shop that does good work???or if there are any *members* on here that can do this kinda of work, let me know...
Thanks
 08-Apr-2008, 06:25 PM
#2
Junior Member
Join Date: Oct 2007
Posts: 18
this was written by Mugen_TaffyEP from ephatch.com
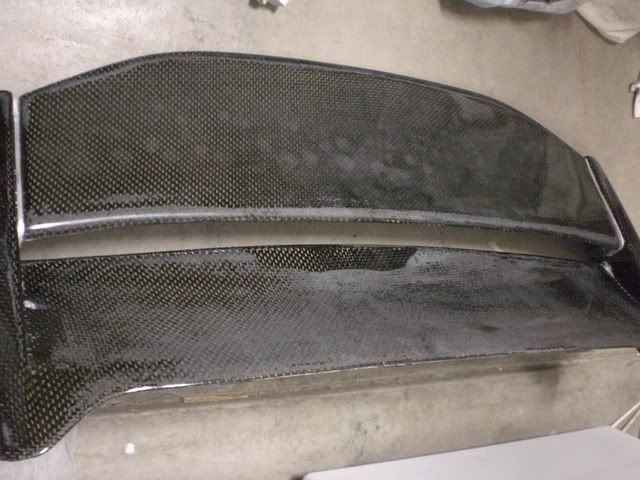
Just like it says in the title. Oxidation can be a bitch and makes your CF look like crap. So anyways my ep is loaded with it and my wing just went to crap. I didnt have the money to pay someone to do it, cause the estimates I recieved ranged anywhere from $200-$350. In total by doing it myself came out to be about $30.
Here's what you'll need:
1) 1,000 Grit Automotive Sand Paper
2) 1,500 " " " "
3) 2,000 " " " "
4) Spray Bottle w/water
5) Plasti-X or something similar to buff out the small scratches.
6) Clay Bar
7) Terry Towels
8) Sponge
9) Applicator Sponge
10) Soap
11) Automotive Clear
Here's what I started with.
Step 1:
Remove the item you want to deoxidize
Step 2:
Spray water on the piece of sand paper as well as the area you will be working on. When sanding, go up and down to prevent from having any uneven strokes.
- 1,000 grit will help get the tougher areas
- 1,500 grit is a finisher
- 2,000 grit is a finisher (not necessary, but if you want to be
professional then by all means)
Step 3:
Rinse with water & then wash with automotive wash/soap
Step 4:
Dry and let it sit for a while if the temperature is cool, cause the moisture keeps some the water there, which you dont want. So if you dont have a shammy, use a terry towel.
Step 5:
Clay Bar the area you have just sanded to remove any small particals that might have embeded themselves.
Step 6:
Wash again to remove any of the spray/clay bar that might have been left behind
Step 7:
Use Plasti-X with the sponge applicator in small areas at a time and work it in, in every direction possible. Let it sitfor 2-3 minutes and then buff it out. At this point it should be clean like it had already been cleared. Look for any spots you might have missed and do it repeat steps 1-7 again if needed.
Step 8:
Prep for clear coating. Tape off any unwanted areas to be sprayed and make sure you are in an environment that wont contaminate the clear. Also use a place that can be well vented, the clear coat is a very strong odor and lasts a while.
Step 9:
Spray Clear
- Wait 30 minutes between layers
- Wait 1 hour at least before use after spraying the last layer
- (i let mine sit out all night until the next morning 9.5 hours)
Step 10:
Look for any flat spots and if needed repeat step 9 until satisfied. If nothing is wrong, look at it and be proud of that bitch!
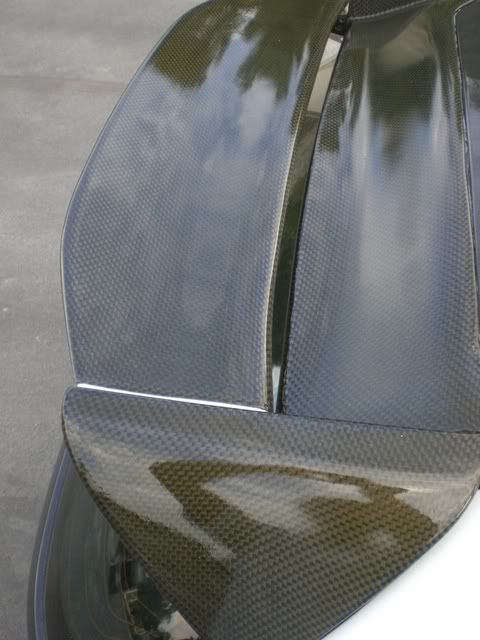
Here's what mine looks like after 3 days now.
Just like it says in the title. Oxidation can be a bitch and makes your CF look like crap. So anyways my ep is loaded with it and my wing just went to crap. I didnt have the money to pay someone to do it, cause the estimates I recieved ranged anywhere from $200-$350. In total by doing it myself came out to be about $30.
Here's what you'll need:
1) 1,000 Grit Automotive Sand Paper
2) 1,500 " " " "
3) 2,000 " " " "
4) Spray Bottle w/water
5) Plasti-X or something similar to buff out the small scratches.
6) Clay Bar
7) Terry Towels
8) Sponge
9) Applicator Sponge
10) Soap
11) Automotive Clear
Here's what I started with.
Step 1:
Remove the item you want to deoxidize
Step 2:
Spray water on the piece of sand paper as well as the area you will be working on. When sanding, go up and down to prevent from having any uneven strokes.
- 1,000 grit will help get the tougher areas
- 1,500 grit is a finisher
- 2,000 grit is a finisher (not necessary, but if you want to be
professional then by all means)
Step 3:
Rinse with water & then wash with automotive wash/soap
Step 4:
Dry and let it sit for a while if the temperature is cool, cause the moisture keeps some the water there, which you dont want. So if you dont have a shammy, use a terry towel.
Step 5:
Clay Bar the area you have just sanded to remove any small particals that might have embeded themselves.
Step 6:
Wash again to remove any of the spray/clay bar that might have been left behind
Step 7:
Use Plasti-X with the sponge applicator in small areas at a time and work it in, in every direction possible. Let it sitfor 2-3 minutes and then buff it out. At this point it should be clean like it had already been cleared. Look for any spots you might have missed and do it repeat steps 1-7 again if needed.
Step 8:
Prep for clear coating. Tape off any unwanted areas to be sprayed and make sure you are in an environment that wont contaminate the clear. Also use a place that can be well vented, the clear coat is a very strong odor and lasts a while.
Step 9:
Spray Clear
- Wait 30 minutes between layers
- Wait 1 hour at least before use after spraying the last layer
- (i let mine sit out all night until the next morning 9.5 hours)
Step 10:
Look for any flat spots and if needed repeat step 9 until satisfied. If nothing is wrong, look at it and be proud of that bitch!
Here's what mine looks like after 3 days now.


Thread
Thread Starter
Forum
Replies
Last Post
imported_GHT
Honda Civic (+ other) Parts/Accessories for Sale or Trade
7
12-Dec-2006 04:22 PM
92extremehatch
Honda Civic (+ other) Parts/Accessories for Sale or Trade
8
02-Nov-2005 07:27 PM
kuruptlx
Honda Civic (+ other) Parts/Accessories for Sale or Trade
26
14-Jul-2005 10:07 AM
imported_Rich@OptionJDM
Honda Civic (+ other) Parts/Accessories for Sale or Trade
7
27-Sep-2004 09:37 PM
Carbon_Cusco_SI
Honda Civic (+ other) Parts/Accessories for Sale or Trade
2
04-May-2004 09:51 PM


